Character Research & Planning
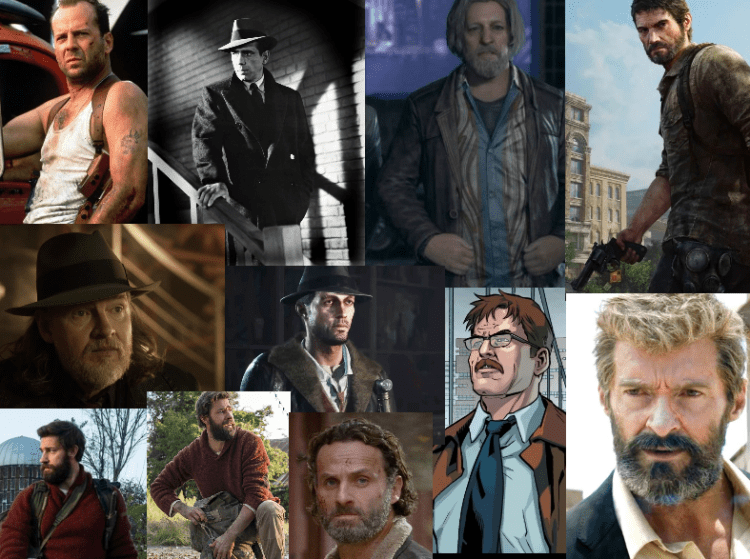
In order to gain insight into the mythology that my character is from, I played through the game Sinking City which also makes heavy use of H.P. Lovecraft’s work. In addition to this, I have also started to listen to an audio reading of Call of Cthulhu by H.P. Lovecraft in order to further familiarize myself with the mythos. My inspiration for this character comes from characters such as Joel from the Last of Us and Kratos from the most recent God of War.

These characters are both reluctant heroes who have either been struck by tragedy or feel guilty about something they have done and then they slowly redeem themselves throughout the narrative. In addition to this, they have some form of internal living and Joel struggles to come to terms with the loss of his daughter – and the resolution of this struggle is ultimately what leads to their success. Using my research, I created a mood board of such characters in popular TV, Cinema, and games. I then used this mood board to create a basic character design and this will be my starting point for the design of my protagonist.
Character Block-Out

My first step was to create a basic silhouette for my character that I would base the rest of my design from. I started by importing a base mesh into Maya and tweaked it in certain areas. For example, I used soft selection to make the abdomen thinner, and then I elongated it to make my character appear skinny. I did the same with the arms and shoulders and then readjusted their positioning to maintain a proportionate body. After that, I used Mayas sculpting tools to give the character some semblance of muscle as, whilst my character would be considered ‘skinny’, he still needs to appear strong enough to defeat enemies within the game. In the picture, you can see the original base mesh on the left and my finished silhouette on the right.
Clothing

At this point, I used the quad draw tool and the symmetry function to begin blocking out the clothes for my character. I started with the trousers, and attempted to create something that resembles formal trousers, such as the ones that would have been worn by a working man in the post WW2 era that my game takes place in. After that, I smoothed out any problem areas with Mayas sculpting tools and scaled the vertices on the openings so that the wear straight, and then extruded the edges inwards to close the gap. Next, I added edge looks to keep sharp edges and then put the trousers into their own layer.

To make shoes, I created a plane with some subdivisions and scaled it to the rough outline of one of the feet. After that, I moved the vertices to create a shape that more resembled a show and the started extruding the edges upwards, then inwards and then bridging the gaps. Next, I manipulated the vertices until I got the shape I wanted. Then, I mirrored the shape so that there were two shoes and separated them so that they were separate objects. I then, again, proceeded to smooth the shape. At this point. I extruded the openings up the leg of the base mesh to create socks stemming from the shoe rather than modelling them as a separate object. I then added supporting edge loops and added the shoes to their own layer.
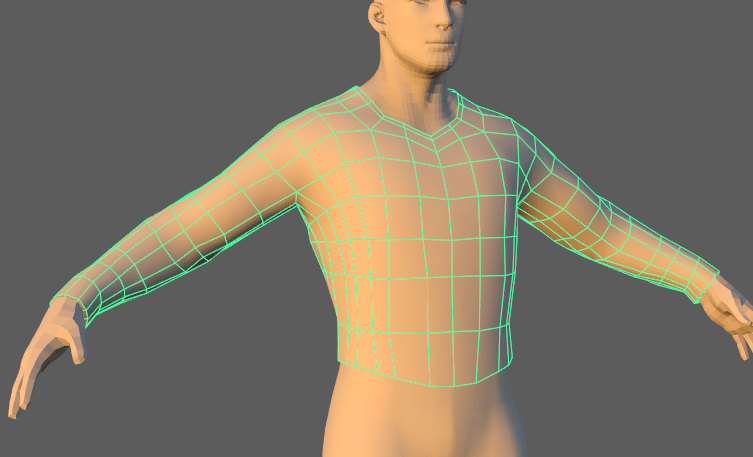
To create the shirt, I used the same method used to create the trousers. Using the symmetry function and the quad draw tool, I blocked out the basic shape. I then extruded the arms of the shirt and added edge loops to give it some form. After that, I smoothed the shape, leveled the vertices around the openings and then extruded the edges in to close the various holes.
Added Detail
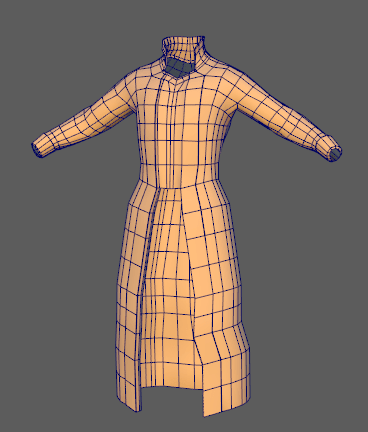
At this point, I expanded on these basic clothes by Creating a trench coat. I did this by using the multi-cut tool in Maya to create a basic outline of the top half on top of the shirt. I then extruded the faces outwards to make it seem like the shirt was under the coat. After that, I extruded the faces around the rim downwards to give the coat some length. Next, I added some edge loops and adjusted them so that the fabric flowed better and did not clip through the rest of the character.
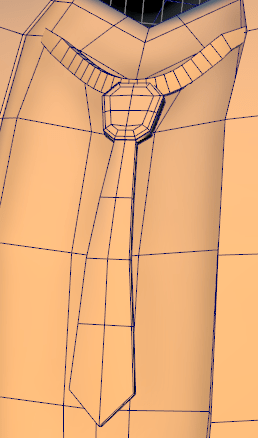
After that, I Created a collar by extruding the face around the top upwards and then pulled the edges forward into a point. Following this, I created a tie by extruding the face of a thin cube along a curve. Next, I used a cube with beveled edges to create the knot of the tie and then extruded the rest of the tie downwards. After that I then added edge loops and adjusted the position to make the tie seem as if it was resting on the shirt, similar to how I adjusted the coat.
UV Unwrapping

After this, I unwrapped each asset using Mayas UV editor. I started by using the automatic unwrap tool to get the full mesh unwrapped. After this, I went over the UV map and used the cut and sew tools to create a more concise and coherent map. After that, I went over the UV shells with the unfold tool so that the map was completely flattened. This also ensured that none for the faces overlapped which would cause issues when it came to sculpting and texturing the model. I started with the trousers and repeated this process for each individual asset. However, I didn’t fully unwrap the head as I was going to be adding geometry to it later in ZBrush to create hair and so I decided that I would use ZBrush’s UV unwrapping tool for this instead once the entire model was finished and ready for texturing. After this, I made sure each UV Map was laid out properly and grouped some UVs together to make them more efficient.
Character Sculpting
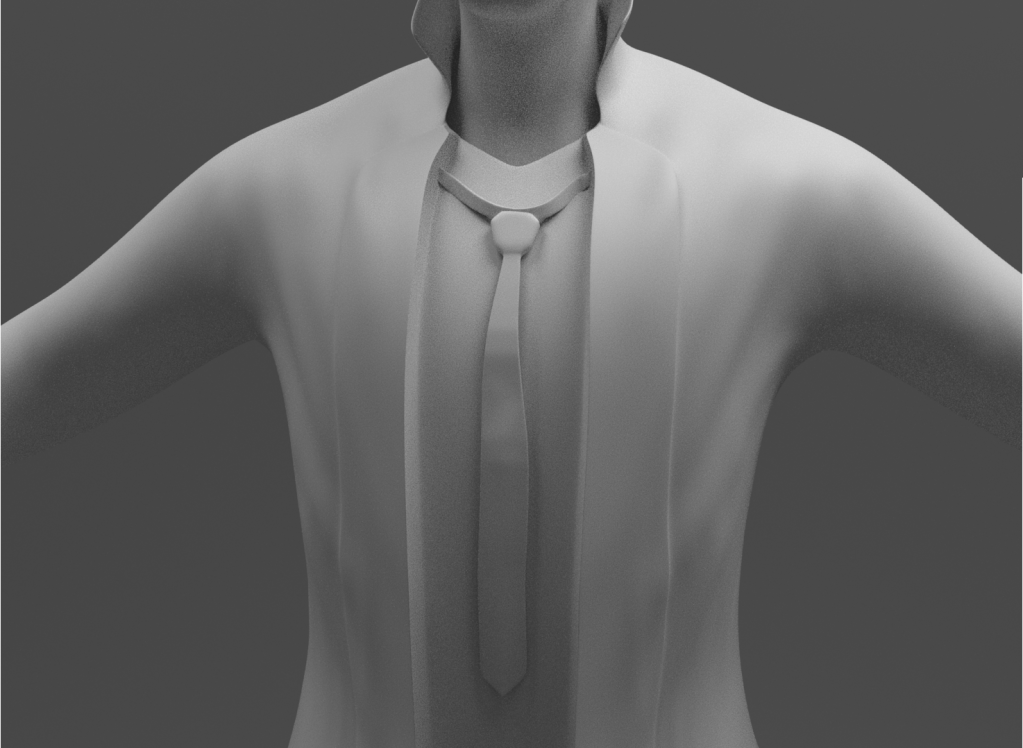
Once I was finished in Maya, I exported the entire mesh as a single FBX file and imported it as a tool into ZBrush to add more detail. I started with the coat as it is the largest asset. I subdivided the mesh to get a good level of smoothness from the mesh and then used ZBrush’s symmetry tool and the standard brush to add some wrinkles and bulges to make the coat appear more like fabric rather than a solid object. Once I had added these base level details. I subdivided the mesh again and used a smaller brush to add finite wrinkles and details in the fabric. After that. I used the Damien Standard brush to add some more definition to areas that had been smoothed by the subdivisions and then also turned off the symmetry and used the same tool to add some damages to the mesh. After that, I moved on to the rest of the models, adding detail and trying to give the illusion of a fabric like material rather than a blocky 3D model. The shoes did not need adding to in my opinion, although looking back I could have added some damages and weathering to them, rather than just leaving them smooth.

When I sculpted the face, I started by getting a rough silhouette of the face shape I wanted in the lower subdivision levels which was a face that was quite slim and gaunt, similar to actor Benedict Cumberbatch as I felt that his particular face shape was a good match for my character. After that, I added more subdivisions and started to add detail to the face. I used the Damien standard tool to add definition to areas of the face that fold in on themselves, such as area around the eyes, nose and mouth. After that, I used the clay build up tool to create hair for my character. I wanted to achieve a shape which resembled a side parting, and so after I had the basic shape, I used the Damien standard tool to create the parting. After that, I added another level of subdivisions and added thin lines to create the illusion of hair rather than just a blob on top of my character head that had the shape of hair. Once I had finished sculpting much character, I appended two spheres to the mesh to represent eyes and then exported the mesh as another FBX file for texturing after some final adjustments.
Texturing
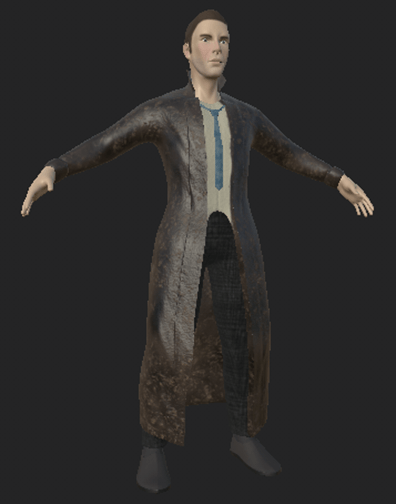
After sculpting my character in ZBrush, I used Substance painter to create the textures for my character. I could’ve textures my character in ZBrush but I wanted to have higher quality textures and I wasn’t that familiar with ZBrush and so I decided to instead use Substance painter as I have some semblance of understanding on how to use the software and also it allowed me to create some really high quality texture and materials for my character. For the coat, I used a leather smart material which I had created for use on some of my assets and then tweaked some of the properties and the colour to make it look different. I then added a cloth texture underneath and added a mask which I then painted to create the texture for the shirt underneath the coat.

After that, I used various material and smart material to texture the rest of the clothes. For the face, I used a basic skin material and then painted the different colour zones to create a more realistic looking skin texture. This texture also worked for the hands and so I just copied across the materials. After that, I added a cloth texture underneath and then used the same method of masking and painting to create a material which resembled hair.

Finally, I used a shiny plastic material on the eyes to give them the glassy like texture and then used a paint layer to add the iris and pupils. After that, to add more detail I used a vein alpha and painted veins onto the eyes. After that, I exported all of the textures for rendering in Maya with Arnold Renderer.
Presentation & Rendering
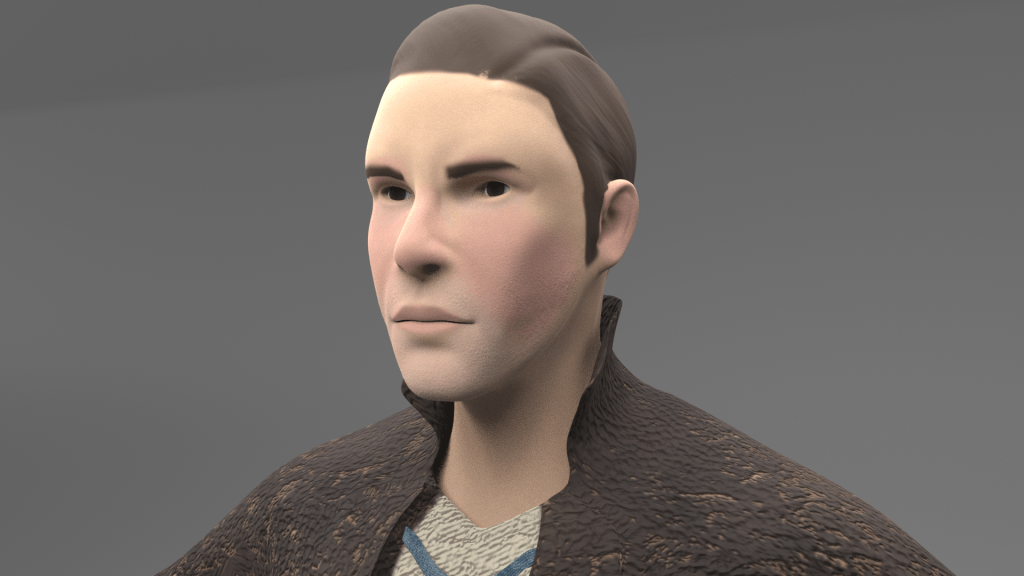
Using hyper-shade, I assigned all of the textures to Arnold materials and tweaked some parameters to set them up properly. After that, I took a quick IPR render to make sure everything was set up correctly and then moved on to creating a rendering stage. I used a plane and a bend deformer to set up an infinity curve to act as the stage for my render. After that, I created an Arnold sky-dome light and set it to an extremely low intensity to create a dim ambient light.

After that, I used some are lights at various intensities and exposures to light My character. To ensure that they were properly focused on my character, I used a feature in Maya that let me look through the lights and made sure that they were all pointing where I wanted them to be focused. After that, I went into the Arnold render setting and added an aiAtmosphere and set it to an extremely low intensity to add some volumetric light rays and also to create a pseudo depth of field effect.
Assets
Asset 1 – Hip Flask:
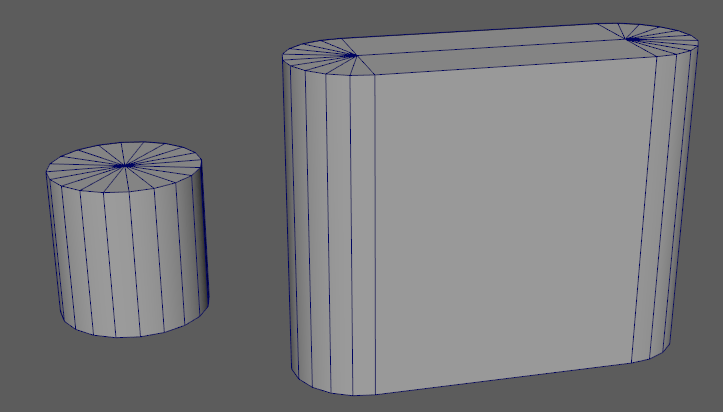
To begin modelling a Hip Flask, I started with a basic cylinder and then scaled it to the correct height. After that, I extruded half of the faces outwards to create a cuboid-like shape with rounded edges. I then added some edge loops to the flat faces and used the bend deformer to curve the object into the correct shape.

After that, I Added another cylinder to the top of the flask to resemble the Cap and then added another cylinder off to the side to resemble the arm that held the cap in place. I then extruded two faces outward and used another cylinder to create a ring around the cap.

I textured this asset in Substance Painter. I first used a leather material for the label on the flask. After that, I used a custom label maker online to create a whiskey label design. I then imported that image into Substance painter and used it to imprint a label onto the flask on a paint layer. I then added a rough leather material under the original layer and used a black mask and a dirt generator to create a damaged leather effect.

After that, I used another paint layer to add scratches and other surface imperfections to my design. For the metal parts, I used a steel smart material and then used a paint layer to add scratches and fingerprints. After that, I exported all of my texture maps and used Arnold in Maya to render the final asset.
Asset 2 – Hat:

Creating the hat proved to be quite a challenge. I tried to create a base using the quad draw tool and using my character as a live mesh, however this always produced mediocre results. So, after trying and failing to do it myself, I looked up videos on how to create a hat in Maya. There was one video that demonstrated the process, however there was no instruction or aids and so I felt that this was vague enough so that I could use this video as a guide but also still consider this asset to be my own work. I started by using a cylinder with 2 end caps and then deleting the other faces and just keeping one end. Next, I deleted the inner faces to leave myself with a flat ring. After that, I scaled it to create an oval shape and then used bend deformers to get the general shape of the rim of the hat. Next, I extruded the outer edge up and then in to create the upwards facing part of the rim. I later added edge loops and moved them to add a curve the shape. After that, I extruded the edge upwards to create the head cavity and then used the bridge too to close the gaps. After this point, the main shape of the hat was completed and so I no longer needed the rest of the video.
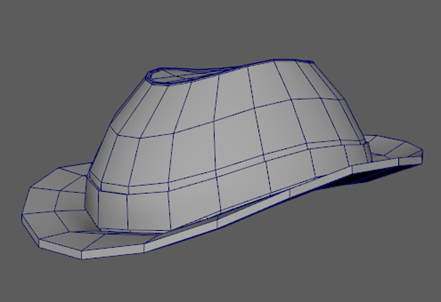
From this point, I used the soft selection tool and the symmetry function to tweak the form of the hat. After that, I added some edge loops and extruded a strip around the base of the head cavity to create a ribbon around the hat. After this, the shape of the hat was completed and so I assigned some materials, ready to export to substance painter. Before that, I added some support loops so that the hat would look good once smoothed; as the hat would be made from fabric, I wanted this asset to be a lot smoother than some of the others and so it would have to have a higher poly count and so adding support loops was essential to keeping the hats shape when smoothing.

Once in Substance Painter, I followed the same steps as I did with the rest of the assets and then finally exported the textures. I once again used the same method as before to render the asset in Maya using Arnold renderer.
Asset 3 – Binoculars:

To begin the block-out of the binoculars, I created 3 cylinders and arranged them in a triangle, I then removed all of the overlapping faces and used the bridge tool to connect them to each other. After that, I added another cylinder in the lower corner and then I used the multi-cut tool to create an edge and then scaled it to be level with the rest of model. After that, I again deleted the leftover faces and used the bridge tool to connect the models together.

After that, I extruded the circular face in and then back to shape the lens. Next, I used soft selection to bulge the lens so that the end model would look more like a lens and not just a flat piece of glass. After that, I did the same thing on the back end of the model to create the eyepiece. Once that was finished, I used the used the multi-cut tool, the extrude tool and the bevel tool to add detail to the model like rings, raised edges and to smooth certain areas.

Following this, I mirrored this model so that I had two sides to the binoculars and then added another cylinder to create the center hinge of the object and then I used the bridge tool to connect them. After that, I added edge loops and used soft selection to curve the arms that connected the two sides to the central hinge. I then used the same method as before to add more detail.

After that, I assigned some materials and exported the model to Substance painter where I used the same methods as the Hip Flask to texture it. After that, I exported all of the textures and used the same process to render the final asset. However, to save on rendering time I decided to not use the HDRI and instead use a more simple lighting setup. I’m not sure of how much difference this made but I used this opportunity to experiment.
Asset 4 – Journal:
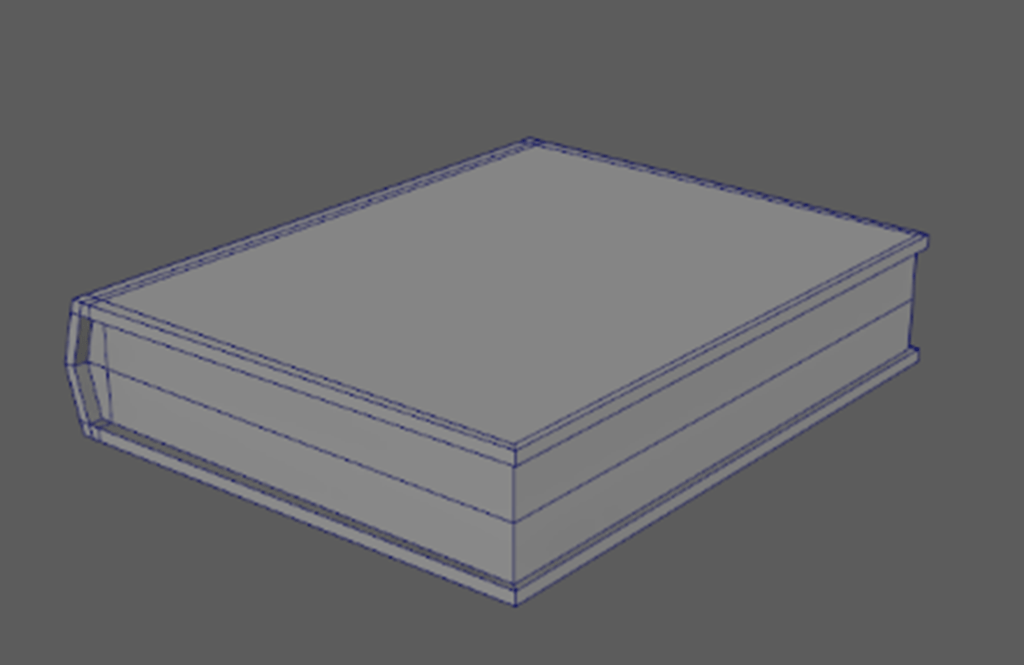
Creating the Journal required more planning than I had originally thought it would. I ran into some issues when creating it whilst making it up as I went along and so I started again and took a more methodical approach. I started by creating a simple cube and scaling it to the rough shape of a book. I then added edge loops in places that would later be moved and extruded, however some of them would have to wait to be added until after I had taken other certain steps. Once all of the edges were properly laid out and in place, I extruded faces around the edge to create a basic book shape.
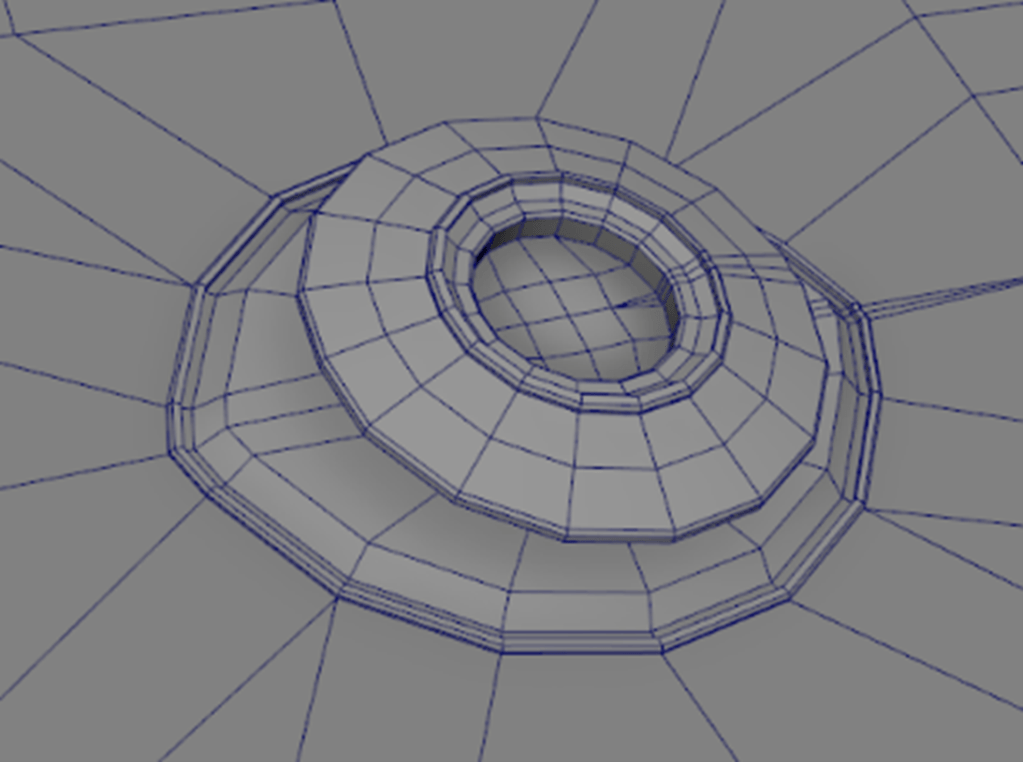
After that, I extruded the back cover up and over the top of the front cover to emulate an old-fashioned leather-bound journal. At this point, I decided to add some sort of buckle to keep the cover closed. To create this, I added edge loops to create a grid on the cover and then circularised a group of faces in the center. After that, I extruded them in on themselves to form a rim and then extruded them up to create a button. After that, I added edge loops and extruded areas to create more detail and then beveled the sharp edges to smooth the shape.
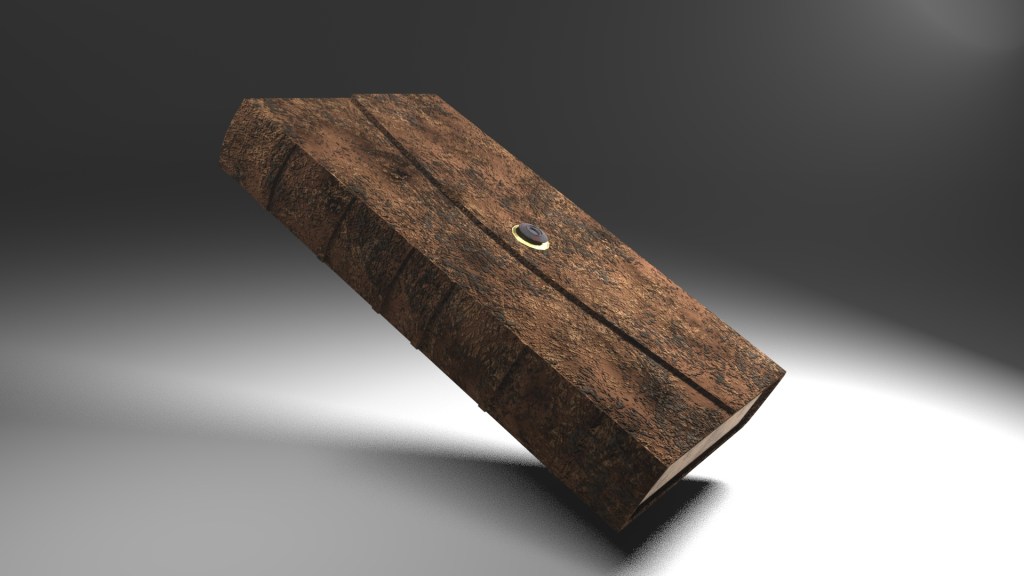
Once I had done that, I assigned some materials and once again exported the mesh into Substance Painter. Once in substance painter, I realised that there was no material for paper, and so I substituted it with a cloth material which I then change the colour and orientation of to emulate pages. After that, I exported the textures and used Arnold renderer to render the final asset.
Asset 5 – Knife:
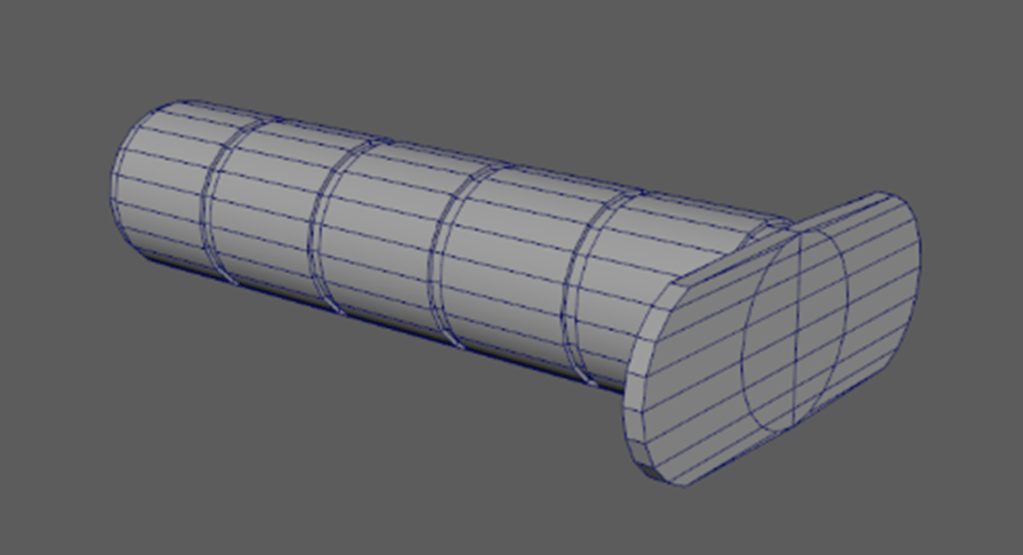
To begin modeling a knife, I started by creating a cylinder. I then retopologised one end of the cylinder so that the faces went straight across rather than meeting in the center as I would later use these faces to create the guard and the blade. Next, I scaled the cylinder to the rough dimensions of the handle and added edge loops so that I could create the grip. To create the grip, I beveled each of the edges to create rings around the cylinder and then extruded the remaining faces outward.
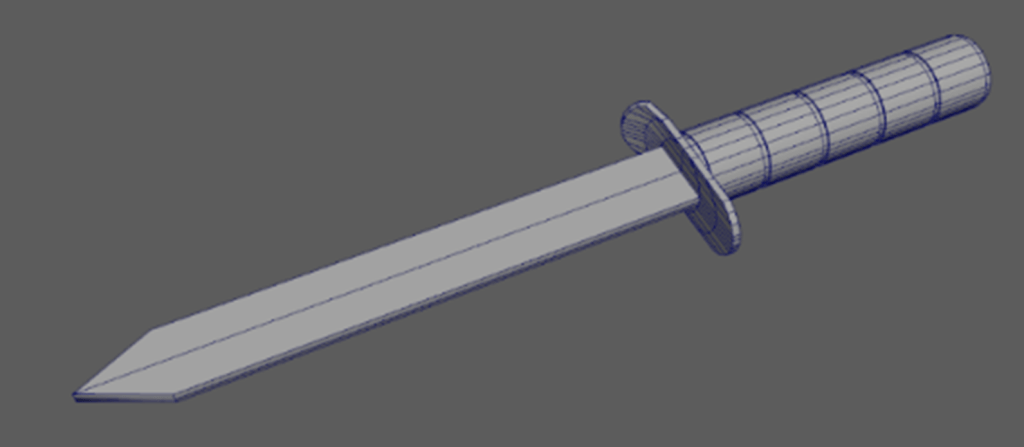
After that, I extruded the retopologised endcap outwards to create the guard for the knife. At this point, I used a bend deformer to curve one side of the guard towards the blade. Next I added edge loops either side of the center and extruded the blade outwards. After this, I added some finer details, assigned materials and exported to Substance painter.

This asset was extremely easy to texture as it was relatively simple when compared to the others. To add some extra detail, I added the characters name to the guard of the knife and added a company name to the blade. Once finished, I exported the textures and rendered the asset using Arnold renderer in Maya. This asset looks best in my pinion because the shininess of the metal compared to the handle is extremely pleasing to the eye.
